
When you look through our list of the best bike lights there are two distinct styles. Many people need lighting for getting to and from work in the winter as well as something for the start, or finish, of a long ride. There’s no need, or desire, for the kind of light that packs a lot of power, and cost, into the package.
A couple of hours at most is all that’s needed and it’s just very simple to make a quality option for a good price. Then there are those who want to try and ride through the night and need to figure out how to make it work. If you fall into the second group there are options out there but they tend to cut it pretty close at best.
Not wanting to leave myself unexpectedly in the dark, I’ve festooned my bars, and bags, with multiple lights in the past. I’ve also added high-end lights with proprietary battery packs but that’s an expensive option. What if a brand did away with some of the proprietary connections?That’s exactly what Outbound Lighting has done.
Outbound Lighting is well known for off-road lights but the Detour is something new not only for the company but the industry. The road-specific light offers the best of both worlds for battery power and there is a side of innovation with the mount and the beam pattern as well. Keep reading to see how this new light manages to do something no other light can.
As soon as you look at the Detour, you’ll know it’s different (Image credit: Josh Ross) Design and aesthetics As soon as you set your eyes on the Outbound Detour light, you will know it’s different. It doesn’t look like any other lights out there. Instead of a round, or sometimes square, body Outbound uses a pair of LED bulbs in a horizontal housing.
There are two lights and two reflectors, each with a different shape. The left is responsible for handling the situational awareness aspect with a diffused patten that casts a wide net. The right lens is there to provide the tight centre spotlight.
Both lenses benefit from a hard upper edge that’s designed to make sure pedestrians and cars are able to see without issue. Surrounding the lenses is a plastic housing. Obviously, this is different than competing brands but it’s not because of an eye on the bottom line.
It doesn’t feel cheap in hand but there is also a paragraph on the product page that specifically addresses any question about the choice. As Outbound describes it, the outer casing is a resin that conducts heat in a particular way. With high-powered lights, heat is a serious issue and making sure it’s easily dissipated is a challenge.
Metal does a good job but it’s also heavy. In this case the rubberized outer is lighter than metal, more durable, and works as well. There are also a series of cooling fins on the top.
The reason the weight matters isn’t some kind of throwback to a bygone era of climbing speed considerations. By keeping the weight down, it opens up options for mounting solutions. Outbound has taken advantage of that with something unlike anything else I’ve seen in the bike light market.
The inspiration comes from camera tripod quick release plates and it works with a mount on the light that pushes on a release in the mount. Push the light in and the spring-loaded release mechanism snaps closed. There are more impressive parts to the whole though.
Image 1 of 5The mount is modeled after the quick release systems found on tripods (Image credit: Josh Ross)Image 2 of 5The edges are angles so they lock into the mount on all sides (Image credit: Josh Ross)Image 3 of 5The locking side is spring loaded and closes when you push the light in (Image credit: Josh Ross)Image 4 of 5There is also an optional action cam mount (Image credit: Josh Ross)Image 5 of 5The keyed shim is a nice touch that keeps it in place (Image credit: Josh Ross) Specifically, what’s interesting is the flexibility the mounting system provides. The light itself will always remain in the same orientation. You can position the light above or below the bars and there’s no change to how the light itself sits.
You can also flip the mount to position the arm on either side of the stem. It doesn’t matter which side the mounting arm for your bike computer occupies, you can flip the light mount so it’s out of the way. If you don’t have round bars, or just want to keep things tidy, there is an optional GoPro-style mount as well.
As we cover the details about how the light mounts, and the unique design, it’s important to note that none of this is the best part of this light. At least not to me. For me, what lets the Outbound lighting Detour light stand-alone is that the USB-C charging cable is weather sealed.
Truly, it’s simple but it’s so unique it requires a walk-through. The USB-C charging port sits at the base of the unit. Look in the centre and you’ll find a rubber flap with a protrusion that’s easy to grab.
Flip it back and buried under a significant amount of rubber is the port. In the box, you’ll find a 36-inch (96cm) USB C-to-A cable with a right angle on the USB-C end. Also on the USB-C end is a bit of moulded plastic that matches the port.
That’s it, that is the big innovation. It’s so simple you have to wonder why no one else is doing it but they aren’t. On the USB-A end, you are free to plug in any quality USB battery pack (look for a QC3.
0 rating) and the light will quick charge while you use it. There are other lights on the market that get this far, the difference is that you can do this in the rain. For me, this changes everything.
Image 1 of 3This cable seems like an off-the-shelf piece, it’s amazing no one else had this idea (Image credit: Josh Ross)Image 2 of 3The charging port supports quick charge via USB-C (Image credit: Josh Ross)Image 3 of 3With the cable in place, the connection is weather sealed (Image credit: Josh Ross) Performance This winter, as I’ve worked on summer plans, there has been far too much time spent doing math with this light. Not because there’s a problem though, this is actually the strength. There are four modes available.
Actually, there are a couple of flashing modes but getting to those requires a long hold. If you simply press the big rubber power button once, the light will power on in adaptive mode. At first, it will remain the same as the high mode and put out the full 1100 watts.
If you are in adaptive mode that power will start at 100% output at the start tapering slowly to ~70% over the first ~20 minutes (based on battery, temperature, and time) then flatten off. The end result is roughly 2. 6hrs + 20min on low.
I like to ride at around 800 lumens for fast road riding so 70% is about perfect. On the other hand, if I go down to medium that puts the run time at 4. 2 hours for 63% power.
I can round down for safety and it’s here where I started doing math and marvelling at the possibilities of this light. The Detour will run at 1100 lumens for 104 minutes using the built-in 5,000mAh battery. I have a 24,000mAh battery pack which should give somewhere around 4.
8 times the burn time. My math says that means using the battery pack I already have on hand, I can probably get through a night near the summer solstice even at full power. If I bump down to adaptive mode or medium, I have more than enough time.
If I want to be over-prepared, I could even pick up another battery pack as insurance. If it rains, all I need to worry about is keeping the battery pack safe inside a waterproof bag. Given that USB battery packs, even good ones, are under constant downward price pressure, it’s hard to imagine there is a less expensive option for extended burn times.
Taking this angle also means I can stay light and simple for the less epic rides. On paper, this light was winning every contest. It was time to put it to the test though.
Image 1 of 2Two tiny LED bulbs put out 1100 lumens at full power (Image credit: Josh Ross)Image 2 of 2There are lenses on the side to add a bit of visibility (Image credit: Josh Ross) What I was most concerned about was the performance at medium power. I knew high would be plenty of light. I also knew low, at 37% brightness, wouldn’t work.
That left adaptive and medium but I tend to not trust any mode that has dynamically changing battery life. medium seemed low on paper but Detour had promised the quality of light would change my perception. It turns out, the brand was right.
Turning on the light is a joy when you are riding. There is no trick to get it to work, just press the button. In the city, even medium was more than I needed.
If you are looking to commute with this light sometimes, low power should be fine in combination with street lights. When I got out of the city, medium was more than enough. The trick is the second reflector that lights up the area near the wheel.
I don’t have issues with blinding other road users because I put the core of most lights closer to my wheel than many people. I like to be able to look down and verify that there’s nothing in front of the tyre. With the Detour light I can aim the core farther down the road and there is more than enough light close to the bike to add a feeling of security.
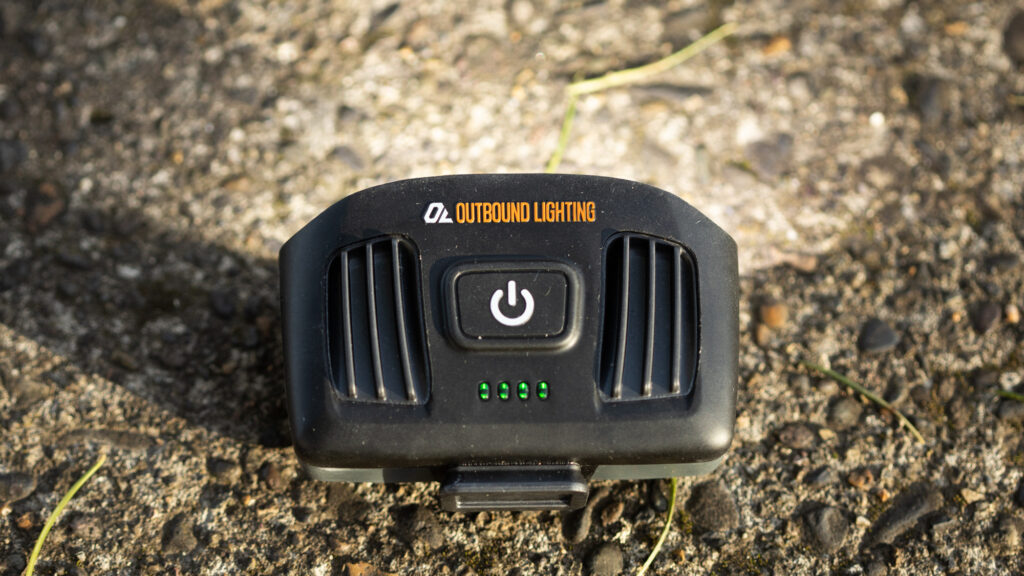
The sharp cutoff makes it all work without blinding anyone. Just as Outbound promised, there is more to the light than the lumen number might have you believe. A plastic outer surrounds one big button with a simple to understand control scheme (Image credit: Josh Ross) Verdict I’m pretty enthusiastic about the Outbound Lighting Detour road light.
Everyone has different needs though and, depending on your needs, you may not be as smitten with the idea of a weather-sealed charging cable. It might not rain as much in your part of the world. Or maybe it does but you are sensible enough to leave trying to ride through the night for times when it probably won’t rain.
If that’s the case, there is still a whole host of details that are just as exciting. You could focus on the shape of the light beam which makes it easier to see with less light. Maybe the concept of an adaptive mode that slowly tapers light to maximise battery life while balancing perceived need sounds exciting to you? Or you could focus on the excellent mounting that keeps the light oriented correctly while allowing mounting above or below and from the left or right.
Whatever your needs, there are a lot of things to like about the Detour. Despite all the good, it’s not perfect and may not be ideal for every situation. In my world, the biggest competition is the Exposure Strada Mk11 SB AKTiv.
Given the price difference, it might seem strange but the use case is much the same. Instead of using USB battery packs, extending burn time means adding proprietary batteries. The appeal is that those batteries are easier to mount and don’t need a waterproof bag.
It also offers more lumens in the mid-range and I don’t need to worry about the light turning on in my luggage. For most people in most situations, the Detour is offering a lot of functionality for the price. If you aren’t travelling with it, the only criticism I’d offer is I’d love to have one more power mode.
Something between medium and high but without the changing light that adaptive offers would be a nice addition. As it stands now, I’ll probably leave it on medium. If I decide that’s not quite right, there’s plenty of leeway to go brighter and I can always add battery packs as needed.
That’s the power of this light. Tech Specs: Outbound lighting Detour light Price: $179. 00Weight: 150g without mountOutput: 1100 lumensBattery: 5000mAhRuntime: Adaptive – 2.
6 h (152 min), High 1. 7 hr (104 min), Medium – 4. 2 hr (250 min), Low – 8.
5 hr (500 min), Daytime Strobe – 10 hr (600 min), Nighttime Flash – 4. 5 hr (270 min).
From: cyclingnews
URL: https://www.cyclingnews.com/reviews/the-outbound-lighting-detour-light-is-the-best-in-one-key-way/