Size: 6. 75 x 2. 5 x 8.
5 inches Bulb Type: LED Rotation: No Sleep timer: No Speaker: No Projection Surface: Not specified We’ve discussed the best binoculars for kids previously, and highlighted the benefits of kids feeling independent and learning about the stars and planets, but what if it’s a cold, cloudy night, or if it’s impractical to keep your kids up past their bedtime to view the night sky? This kit offers hands-on science education from the comfort of your sofa (or crafting table). The Create a Night Sky projection kit (Sold in the U. K.
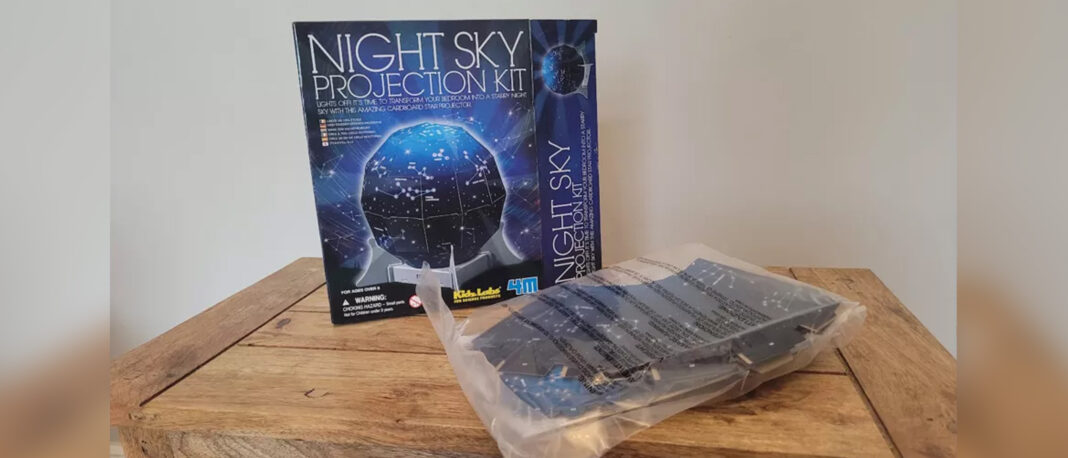
as the Science Museum Create A Night Sky and elsewhere as the 4M Night Sky Projection Kit) is on our list of best star projectors and is the only do-it-yourself projector on our list. It’s made by 4M KidzLabs, who make ‘creative educational toys’ to enhance and inspire curiosity in young children. They have a wealth of ‘DIY’ kits aimed to encourage learning and to expand your child’s mind, other kits include assembling your own planetarium (opens in new tab) and make your own rocket launcher (opens in new tab) .
The Create A Night Sky Projection Kit It is ultimately a printout on some cardboard cutouts, you punch holes through it to make the constellations, assemble the globe, and position it over a light to form a projection. To be honest, we weren’t too excited about trying it out, and some other online reviews are scathing, but has making one for ourselves changed our minds? This is a simple idea for an educational time filler. You get two cardboard cutouts with the Northern Hemisphere on one and the Southern Hemisphere on the other.
There’s a small plastic stand, supported by four little ‘feet’ which contains the bulb. This is where the finished ‘globe’ sits. We’d have preferred a more sustainable stand, perhaps wood would be better, and looked nicer too.
The cardboard provided, which creates the dome, is nothing more than what your cereals are packaged in, it isn’t corrugated or reinforced anyway, although you do get some sticky tape to help hold it together, more on this later. You create the dome to sit over the bulb, following the step-by-step, detailed guide provided to punch holes through the cardboard (for the light to shine through and display the constellations) and then assemble it using origami style techniques, again following the guide. We followed the step-by-step guide word for word to make sure we weren’t cutting any corners or missing anything out.
The first step is to punch through the printed stars using something sharp. As the guide states, it’s best to start smaller and then expand the holes if necessary. We laid the print on the box the kit came in, as per what it told us to in the guide, and began punching our way through the cardboard with a fine pen.
Some of the stars are quite close together so we did end up accidentally punching through some of the cardboard where we shouldn’t have. Once we’d finished punching through all of the constellations, it was time to assemble it into its globe shape. This is fiddly.
Especially if like us, you have little patience when it comes to arts and crafts. Once you have something which resembles a dome shape with all of the little tabs in their allocated slots, you can add the provided sticky tape to the inside of the dome to add some strength to the structure. It’d be wise to add some more of your own too.
Here is where you pick which hemisphere you want at the top of your globe and fix in the ‘cap’ and the underside of the globe (the other hemisphere) leaving one hole open where the bulb will sit. Again, fiddly, doable with patience, but fiddly non the less. It’s worth highlighting that because the idea is that the ‘stars’ will be projected onto a wall or ceiling, the actual print your child will be punching holes in is mirrored to what you’d see in the real night sky, so all of the constellations are backward.
This could be detrimental to learning but as long as the ‘helper’ (which is definitely needed) explains this, we can look over that. It’s also quite a neat way to demonstrate how projections work. You do need some extra bits and pieces to get going and to complete the globe.
Namely, extra tape (as the small amount provided isn’t enough and could do with being stickier’, a pointy implement for poking the holes through the cardboard, a fine pen, or thin sharp nail would be best. You also need to supply 4 x AA batteries for the bulb as well as a screwdriver to insert said batteries. Best star projectors Best locations for astrophotography Best stargazing tents Best cameras for photos and videos Best telescopes Best binoculars If the price is right, why not? Anything more than $15, we think is pushing it.
We’ve seen it on Amazon for as much as $32 and we’re not sure what makes it fluctuate so much and would certainly be disappointed if we paid the higher price. It is an educational tool for young children, but only if an adult ‘teaches’ alongside putting it together. For a sturdier, longer-lasting, and more versatile scientific learning experience, purchase the Sega Homestar Flux if you can.
It can be used for many years, has heaps of interchangeable discs to learn from and there are no fiddly crafts involved to fit it all together!.
From: space
URL: https://www.space.com/4m-create-a-night-sky-projection-kit-star-projector-review/


